Turn Your Rental into a Smart Home—Without Losing Your Deposit
You can build a useful, renter‑friendly smart home for about $400—NO DRILLING, NO LANDLORD DRAMA. This guide shows quick, practical buys, easy weekend installs, and simple upgrades so you get comfort, safety, and convenience without tech confusion or deposit risk.
What You’ll Need (Short List)
- About $400
- A smartphone
- Reliable Wi‑Fi
- Screwdriver or adhesive hooks
- Permission to plug things in
- Comfort with apps; no coding required
1. Echo Show
Why This Is the Brain of the Entire Setup
This is the most important device in the whole system — not because it’s flashy, but because it connects everything together.
The Echo Show doesn’t replace your other apps.
It replaces the need to think about them every day.
Once your devices are linked:
- You talk to Alexa
- Alexa talks to the brands
- You stop juggling apps
WiFi Guy translation:
Alexa becomes the steering wheel. The brand apps stay under the hood.

Smart Apartment Setup: 10+ Easy, Moveable Ideas
Decide What Matters: Comfort, Safety, or Convenience?
Pick one or two priorities so your $400 actually makes life better. Focus keeps you from buying every shiny gadget and leaving with nothing that truly helps.
Choose practical combos that fit rentals: lighting and smart plugs give instant convenience; a voice speaker adds hands‑free automation; a single camera or door sensor covers basic security.
- Comfort example: 1 smart bulb + 1 smart plug for a lamp and coffee maker.
- Safety example: 1 indoor camera or a door/window sensor.
- Convenience example: 1 voice speaker to control lights and timers.
Allocate your budget deliberately: put 40–50% into your top priority, 30% into a complementary device, and hold 10–20% as a buffer for cables, adhesive mounts, or a slightly better speaker. Start by choosing one or two priorities so your $400 buys real value. For renters, lighting and plugs give immediate convenience; a voice speaker adds automation; a single camera or door sensor adds security. Allocate roughly 40–50% to your top priority, 30% to a complementary device, and keep 10–20% as a small buffer for cables, adhesive mounts, or a better speaker. This prevents impulse buys and ensures each purchase improves your daily life.
2. TP-Link AX10 Router
Why Your Router Matters More Than You Think
Smart homes don’t fail because of speed.
They fail because of too many devices talking at once.
This router uses Wi-Fi 6, which is better at:
- handling lots of small “check-in” messages
- keeping smart devices from clogging the network
- staying responsive even when everything is connected
Important renter takeaway:
Even in a small apartment, device density matters more than square footage.

Smart Shopping: What to Buy for Maximum Impact
Buy renter‑friendly, plug‑and‑play devices that you can install in minutes and pack up without damage. Go for Wi‑Fi or Bluetooth gadgets so you don’t need a landlord‑level install.
Pick the basics:
- 2–4 smart bulbs or one smart LED strip (Wi‑Fi or Bluetooth)
- 2 smart plugs for lamps, fans, or a coffee maker
- 1 affordable smart speaker (Echo Dot or Nest Mini) for voice control
- 1 inexpensive indoor Wi‑Fi camera or a door/window sensor for basic security
Check these tips before checkout: avoid devices that require a permanent hub unless the hub is cheap and clearly removable; hunt bundle deals, refurbished units, and seasonal sales to stretch your $400; and choose trusted brands so apps and firmware updates don’t ghost you. For example, buy one smart bulb for mood lighting and a smart plug for the lamp — instant ambiance and automation with zero drilling.
3. Wireless Home Security System
Why These Sensors Don’t Slow Down Your Wi-Fi
This is where most people have an “ohhh” moment.
The door and motion sensors do not connect to your Wi-Fi at all.
Instead:
- Sensors talk to a base station using a private radio signal
- Only the base station talks to your router
So if you have 10 sensors:
- Your router doesn’t see 10 devices
- It sees one
WiFi Guy Speak:
The sensors whisper to the hub. The hub does the talking.
That’s why alarm systems stay reliable and battery-friendly.

Install Like a Boss: Fast, Clean, and Landlord‑Friendly
Unbox and update each device’s app first — firmware fixes annoyances faster than you can say “Wi‑Fi.” Create accounts, then connect to your 2.4 GHz network if a device asks (many cheap ones need it).
Test one device at a time. Power it, follow the app prompts, and make sure it responds before moving on. For example, set a smart bulb to white, then change color to prove it works.
Mount gear without tools. Use:
- Adhesive strips (Command strips)
- Command hooks
- Removable mounting plates
Place cameras in common areas only and aim them away from neighbors (think living room corners, not windows). Group bulbs and plugs into rooms in the app, then set simple automations: motion → light on, presence → away mode, or time → morning coffee on.
Label devices clearly in the app so you can ask the voice assistant for “Kitchen lamp.” If using voice control, link accounts in the voice assistant app and enable the right skills or services.
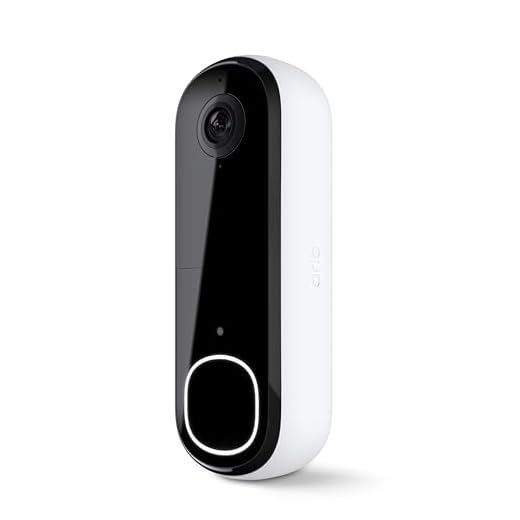
4. Arlo Video Doorbell
Why Cameras Are Different Than Sensors
Cameras are the opposite of alarm sensors.
They:
- stream video
- use more bandwidth
- connect directly to Wi-Fi
That’s normal — and totally fine — as long as you don’t overload your network with too many Wi-Fi-only devices.
Why this setup works:
You’re mixing hub-based security sensors with Wi-Fi cameras, instead of putting everything on Wi-Fi.
Balance beats brute force.
Make It Smarter and Move‑Ready: Tweak, Save, and Pack Easily
Optimize automations after a few days. Adjust motion sensitivity if lights are flipping on from streetlights (lower sensitivity) and set camera motion zones to ignore sidewalks or roads so you get fewer false alerts.
Schedule bulbs to mimic presence when you’ll be away — for example, turn living‑room lights on at 7 p.m. and off at 10:30 p.m. to look lived‑in.
Turn on energy‑saving settings: dim bulbs to 60%, set smart plugs to cut power overnight, and use schedules to avoid phantom energy drain. Enable two‑factor authentication on all accounts — it’s quick and stops strangers.
Keep receipts, serial numbers, and original boxes (or a labeled zipbag with mounts and screws) so devices are easy to remove and take with you.
Troubleshoot quickly: reboot the device, check Wi‑Fi (2.4 GHz if needed), move it closer to the router, and update firmware in the app.
Pick one future upgrade (better camera or a smart lock) and stash a small fund — aim for $50–$80 saved.
5. Tapo Smart Bulbs
Why You’ll Use Alexa Instead of the Tapo App
Tapo is owned by TP-Link, and yes — it has its own app.
You’ll use that app to:
- add bulbs
- update firmware
- tweak advanced settings
But once linked to Alexa:
- you won’t open it daily
- voice commands and routines do the work
Key point:
Tapo bulbs are Wi-Fi devices, but Alexa is how you live with them.
6. Kasa Smart Plugs
Why These Are the Easiest Wins in the Whole Setup
Smart plugs are the gateway drug of smart homes.
They:
- connect directly to Wi-Fi
- require almost no setup
- instantly make “dumb” lamps and devices smart
Like Tapo, Kasa is also a TP-Link brand — which means:
- similar setup
- similar Alexa integration
- zero learning curve
Renter bonus:
No wiring. No holes. No landlord drama.

Kasa smart plugs make it easy to control everything from anywhere using the Kasa app. At home, at work, or on vacation — it doesn’t matter. You can check if something’s on, turn it off remotely, or set simple schedules so things run automatically without you thinking about it.
Setup is about as simple as it gets. Plug it in, connect it to your 2.4 GHz Wi-Fi, and follow the steps in the app. Each plug can handle up to 15 amps, is UL certified for safety, and has been used by millions of people. It’s reliable, boring in the best way, and just works — which is exactly what you want from a smart plug.

These Kasa smart plugs let you control anything that plugs into the wall using your voice or your phone. Lamps, fans, holiday lights — if it has a plug, it can be turned on or off with Alexa or Google Assistant. It’s one of the easiest ways to make “dumb” stuff feel smart without replacing anything.
One Important Reality Check (Before the Fun Part)
Most smart homes work like this:
Your voice → Alexa → brand cloud → device
That’s normal.
That’s why you may have multiple accounts.
That’s why Alexa exists — to hide that complexity.
Matter devices can reduce this later, but you don’t need them to get a great setup.
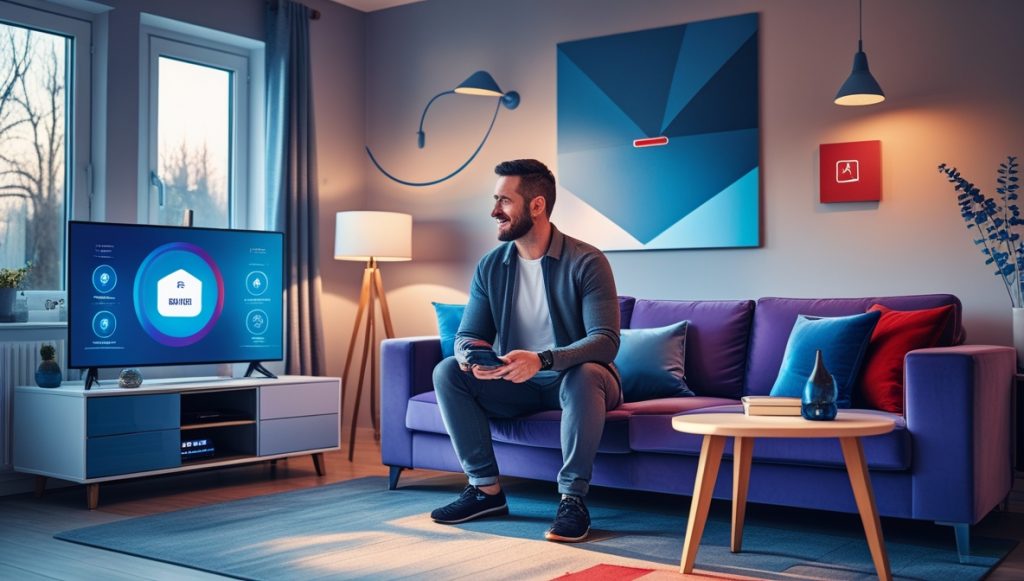
Now for the Fun Part: Routines You Can Use Immediately
Beginner Routines That Make This All Feel Worth It
This is where everything finally clicks.
Once your lights, doorbell, and alarm are connected to Amazon Alexa, you stop thinking in terms of devices and start thinking in terms of moments.
You don’t need to be a power user. These are simple, high-impact routines that just work.
1. “I’m Leaving” (The One-Tap Lockdown)
What it does:
Turns your entire place “off” and arms the alarm in one move.
Trigger:
Voice command: “Alexa, I’m leaving”
—or—
One tap in the Alexa app
Actions:
- Arm the alarm system (Away mode)
- Turn off all smart lights
- Turn off smart plugs (lamps, fans, coffee makers)
Why it’s great:
No more walking room to room wondering if you forgot something. One command, done.
2. “Goodnight” (Security Without Waking Yourself Up)
What it does:
Secures your place while you’re still inside.
Trigger:
Voice command: “Alexa, goodnight”
Actions:
- Arm the alarm in Home/Stay mode
- Turn off all lights except bedroom
Optional: wait 2 minutes, then turn bedroom light off
Why it’s great:
Doors and windows are protected, motion sensors don’t freak out, and you don’t have to touch your phone in bed.
3. Door Opens → Light Turns On (Simple, Smart, Impressive)
What it does:
Uses a door sensor instead of a motion sensor.
Trigger:
Front door opens
(Condition: only after sunset)
Actions:
Turn on entryway or living room light
Why it’s great:
It feels high-end, but it’s dead simple.
And it works better than motion sensors in small apartments.
4. “Welcome Home” (Hands Full Friendly)
What it does:
Makes coming home feel intentional instead of dark and awkward.
Trigger:
Door opens or voice command: “Alexa, I’m home”
Actions:
- Disarm the alarm (with voice PIN)
- Turn on main lights
Optional: turn on a lamp via smart plug
Why it’s great:
Groceries, bags, keys — you don’t need to fumble with switches or apps.
5. Alarm Trigger → Lights Go Crazy (Deterrent Mode)
What it does:
Turns a quiet alert into a loud visual deterrent.
Trigger:
Alarm is triggered
Actions:
- Turn all lights on to 100% brightness
- Optional: set lights to red or flashing
- Alexa announcement on Echo devices
- Phone notification
Why it’s great:
Most break-ins rely on darkness and silence.
This does the opposite.
6. Doorbell Pressed → Lights On (Nighttime Safety)
What it does:
Responds to someone at the door without you touching anything.
Trigger:
- Doorbell button pressed
- (Condition: after sunset)
Actions:
- Turn on porch or entry lights
- Optional: turn on living room lamp
Why it’s great:
It makes your place look occupied and gives you instant visibility.
7. “Movie Mode” (Because Not Everything Is About Security)
What it does:
Sets the mood with one command.
Trigger:
Voice command: “Alexa, movie mode”
Actions:
- Dim lights to 10–20%
- Turn off overhead lights
- Leave accent or lamp lighting on
Why it’s great:
This is usually the first routine that makes people say,
“Okay… this smart home thing is actually cool.”
You’re Done—Enjoy a Smarter Rental
With planning, the right buys, and simple installs you’ll have a useful smart home for about $400. It’s renter‑safe, portable, and actually helpful—no tech PhD required. Try it, tweak it, then share your setup and tips so others learn too!


Neutral feedback: the installation tips are great but the ‘move-ready’ section felt a bit short. I wanted more on backing up settings and exporting device configs before moving.
Also unlink devices from voice assistants first, then factory reset — saves a weird ghost-device problem later.
This guide saved me money — huge fan. One weird issue: my cheap smart bulb gets weird colors when dimmed via voice but works fine in the app. Anyone else?
Thanks! I’ll try firmware first then consider swapping.
Long post because I want to share my whole setup (hope that’s okay):
I went for a safety-first build: one video doorbell, two door/window sensors, three smart bulbs in living spaces, and two smart plugs for small heaters. Total ~ $380.
Installation: used Command strips for sensors, hid wiring with adhesive channels, and left the thermostat alone.
Renter concerns: took photos before/after and kept all original hardware. Landlord had zero complaints.
Lessons learned: buy at least one extra battery for the doorbell and label EVERYTHING. Moving out was painless.
Hope this helps anyone trying to replicate a safety-centered setup!
This is the kind of comment I needed. Thanks for sharing the exact counts and price!
Love the humor and realistic budget examples. One constructive thought: add a sample shopping cart with links (or model names) under $400 so readers don’t have to hunt brands themselves.