Smart List Of Smart Hubs Including Starter Automations
You don’t need a house full of gadgets or a tech degree to start a smart home.
You just need one good hub, a little patience, and a plan that doesn’t spiral out of control.
This guide focuses on three solid starting points, depending on how you want your smart home to feel:
- Amazon Echo Show 11 – voice-first, screen included
- Philips Hue Bridge Pro – lighting perfection
- Tapo H500 – privacy-first, local control
No jargon. No ecosystem wars. Just clear guidance.
You can make your home smarter without a meltdown. This guide helps you pick one of three top smart hubs, set it up, and automate lights, locks, and assistants in plain English—no jargon, just clear steps and a little humor.
What You’ll Need
- Reliable Wi‑Fi
- Smartphone or tablet
- Smart hub (Zigbee, Z‑Wave, or Wi‑Fi)
- Devices you want to control
- Basic passwords
- Patience — no tech degree needed
Pick the Hub That Matches You
Before specs and features, ask yourself one simple question:
What do I want my smart home to do most of the time?
Talking to your house?
Perfect lighting scenes?
Keeping video and data off the cloud?
That answer picks your hub for you.

Amazon Echo Show 11 — “Just Talk to the House”
Best for: Easy voice control + visual feedback
Personality: Friendly, helpful, slightly nosy
The Echo Show 11 is the easiest on-ramp to a smart home. You talk, it listens, things happen.
Lights off. Music on. Camera feed on the screen while you’re cooking.
You don’t manage devices — Alexa does.
Why it works
- Big, bright touchscreen
- Alexa routines are dead simple
- Massive device compatibility
- Great for timers, reminders, cameras, and casual control
Watch-outs
- Cloud-based (privacy settings matter)
- Not ideal for advanced local automations
👉 Perfect if: you want smart home benefits today, not a new hobby.
WiFi Guy-Approved Starter Automations For Amazon Echo Show 11
(These will not lock you out of your house or turn lights on at 3am)
Automation #1: “Goodnight”
Trigger: Voice command — “Alexa, goodnight”
What it does:
- Turns off all lights
- Locks smart locks (if you have them)
- Sets a low night-light or bedroom lamp (optional)
👉 Why this works:
One phrase. One purpose. No conditions. No guessing.
Automation #2: Motion Light (Low Risk Version)
Trigger: Motion detected
Condition: Only after sunset
Action: Turn on hallway or kitchen light for 5 minutes
👉 Why this works:
Motion + time is reliable. Motion alone is not.
Automation #3: Visual Door Check
Trigger: Doorbell press
Action: Show camera feed on Echo Show screen
👉 Why this works:
No phone scrambling. No app digging. Just glance and decide.

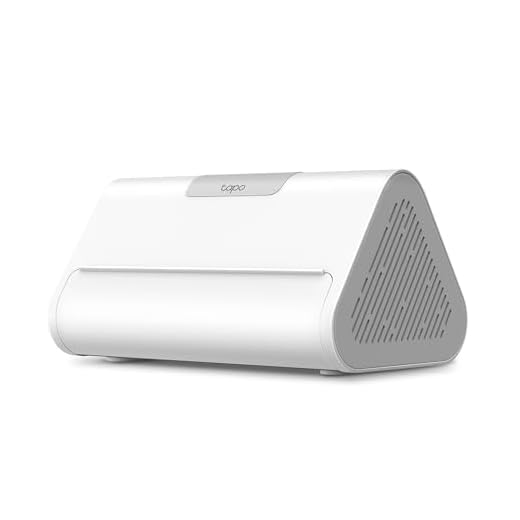
Tapo H500 — “Smart Home, Minus the Cloud Drama”
Best for: Cameras, sensors, and privacy
Personality: Quiet, practical, doesn’t overshare
The Tapo H500 is for people who don’t love subscriptions or monthly nags.
It records locally, stores data in your house, and keeps things simple.
Why it works
- Local camera recording (no forced cloud fees)
- Supports lots of sensors and cameras
- WPA3 security
- Clean, straightforward app
Watch-outs
- No built-in voice assistant
- Smaller ecosystem than Alexa
👉 Perfect if: privacy and local control matter more than voice tricks.
Starter Automations For Tapo H500 (privacy-first homes)
Automation #1: Away Mode (Local)
Trigger: Manual toggle in app
Action:
- Cameras record
- Motion alerts enabled
👉 Why this works:
No flaky geofencing. You choose when you’re away.
Automation #2: Night Watch
Trigger: Scheduled time (example: midnight–6am)
Action:
- Outdoor cameras active
- Indoor cameras off (privacy preserved)
👉 Why this works:
Security without feeling watched in your own house.
Automation #3: Local Storage Safety NetTrigger: Motion detected
Action:
- Save clip locally
- Optional alert only for people detection
👉 Why this works:
You keep recordings even if Wi-Fi or cloud hiccups.
Set Up the Hub — Plug, Pair, Protect
Unbox and plug the hub in. Place it somewhere central (not stuck in a closet). If you can, connect the hub to your router with Ethernet for the most reliable connection.
Download the hub’s app and sign in. Create a new account or sign into the one you’ll use daily. Follow the app’s step‑by‑step pairing prompts — they usually guide you through discovery and naming.
Update the hub firmware first. Install any updates before adding lots of devices — updates often fix bugs and broaden compatibility.
Pair devices one at a time. Keep each device close to the hub while pairing. For Zigbee/Z‑Wave gear, follow the manufacturer’s pairing mode — press a button, open/close a sensor, or power cycle the device as instructed.
Troubleshoot pairing issues. If something won’t pair, remove it from any previous account, do a factory reset on the device, or bring it closer to the hub during setup. Example: a smart lock that won’t join often needs a power cycle and to be within a few feet of the hub.
Secure your hub account. Create a strong, unique password and enable two‑factor authentication if offered. Store credentials and device backup codes in a password manager.
Isolate smart devices on the network. Consider putting IoT devices on a separate Wi‑Fi SSID or guest network to limit access from your main devices and reduce security risk.
Name devices clearly and assign rooms. Use plain names like Kitchen Light, Front Lock, or Nursery Camera so automations and voice commands make sense. Set each device’s location in the app so “turn on the light” actually works.
Decide on bridges. If you have Hue bulbs, pick whether to control them through the Hue Bridge (best for advanced scenes) or directly via the hub for simplicity.
Run quick tests. Ask your voice assistant to turn a light on, lock a door, or show a camera feed. If devices drop or lag, move the hub more centrally or add repeaters/extenders for Zigbee/Z‑Wave and Wi‑Fi.
Give everything a night of real use. Keep device passwords in a secure manager and, if you get stuck, search the manufacturer’s support articles, community forums, or ask their customer chat. Most problems are a missing step, not broken hardware, and breathe seriously.
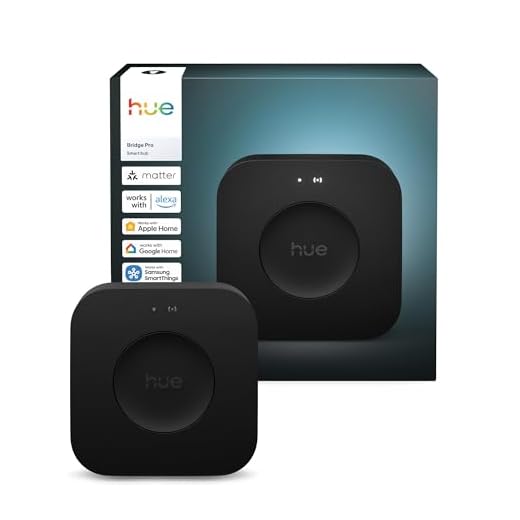
Philips Hue Bridge Pro — “Lights That Actually Behave”Best for: Serious smart lighting
Personality: Quiet, fast, dependable
This hub does one job — lighting — and does it ridiculously well.
If you care about:
- Instant light response
- Smooth dimming
- Scenes that don’t randomly fail
The Hue Bridge Pro is non-negotiable.
Why it works
- Controls 150+ lights without lag
- Local Zigbee control (fast + reliable)
- Advanced scenes and automations
- Lights keep working even if Wi-Fi hiccups
Watch-outs
- Only controls Hue lighting (not a full smart home hub)
👉 Perfect if: lighting is the foundation of your smart home.
For Philips Hue Bridge Pro (lighting-first homes)
Automation #1: Sunset Lighting Scene
Trigger: Sunset
Action:
- Living room lights → warm white
- Porch light → on
👉 Why this works:
Hue excels at time-based lighting. This is its superpower.
Automation #2: Bedtime Fade
Trigger: Scheduled time (example: 10:30 PM)
Action:
- Lights dim gradually over 10 minutes
- Then turn off
👉 Why this works:
No harsh shutoffs. No yelling “turn off the lights.”
Automation #3: Movie Scene
Trigger: Scene button or voice command
Action:
- Lights dim to 20%
- Bias light behind TV turns on
👉 Why this works:
Scenes > automations when you want control.
Side-by-Side Comparison (Plain English)
| Feature | Echo Show 11 | Hue Bridge Pro | Tapo H500 |
|---|---|---|---|
| Main Strength | Voice + screen control | Lighting performance | Local storage & privacy |
| Voice Assistant | Alexa built-in | Uses Alexa/Google | None |
| Local Control | Limited | Yes (lighting) | Yes |
| Best Devices | Lights, plugs, cameras | Hue lights & accessories | Cameras, sensors |
| Cloud Dependence | High | Low | Very low |
| Setup Difficulty | Easy | Easy | Easy–Medium |
| Ideal Starter? | ✅ Yes | ⚠️ Lighting only | ✅ Yes |
Automate and Enjoy — Make Your Home Do the Small Stuff
Start with simple automations: turn on porch lights at sunset, lock doors at bedtime, or shut off sprinklers when rain is forecast. These quick wins show immediate value and are easy to test.
Use clear triggers and plain‑English conditions. Time, device state (like “garage door closed”), and geolocation (your phone arriving or leaving) are the most reliable triggers. Example: “At sunset → turn on Porch Light” is better than a giant multi‑condition rule.
Make each automation do one job. Build tiny rules you can debug easily instead of one monstrous rule that tries to do everything. If something misbehaves, you’ll know which small rule to fix.
Leverage routines (or scenes) to group actions. Create a Goodnight scene that dims lights, lowers the thermostat, and locks doors in one tap. Use scenes for mood setups: “Movie” dims lights and closes blinds.
Test voice commands and keep phrases natural. Try short commands like “Hey — goodnight” or “Movie time.” Rename confusing devices (avoid the default “Living Room Lamp 2”) so voice assistants don’t get confused.
Consider presence‑based automations but treat them cautiously. Use your phone’s geofence or a smart key fob to trigger arrivals and departures. Add a buffer (like 1–2 minutes) to avoid false triggers when you’re stuck in the driveway.
Add delays and safety checks for risky actions. Require confirmation before unlocking doors remotely or schedule sprinklers to run only if no rain is forecast. Use a quick confirmation popup or a PIN for remote unlocks.
Monitor automations for about a week and adjust timing or triggers based on real use. Share access carefully: create separate user accounts for family members and limit guest permissions.
Back up rules when your hub allows it, and keep firmware current. Prefer local processing when privacy matters (motion → light) so less data goes to the cloud.
Troubleshoot by checking logs, isolating the problem device, and simplifying the rule until it works.
Enjoy the tiny daily conveniences — they add up to a house that actually makes life easier. You’re doing great — automate bravely.
WiFi Guy’s Final Take
A smart home isn’t about having more stuff — it’s about having less friction.
- Want effortless control? Echo Show 11
- Want flawless lighting? Hue Bridge Pro
- Want privacy and local control? Tapo H500
Pick one, live with it for a week, then grow from there.
You’re not behind.
You’re not doing it wrong.
You’re building it smart.
You’re Ready — Start Small, Grow Smart
You now know how to pick, set up, and automate a smart hub—start small, test often, and add features. Try a simple routine today, share results, and tell us how it goes — your home will thank you for real.


Quick comparison request: which hub has the best local control (no cloud) options? I want automations to keep working if internet goes out.
Home Assistant users love local control — but expect a steeper learning curve.
If local control is a priority, check community forums for confirmation because marketing can be vague.
Look for hubs that advertise local processing or local APIs. The mid-tier and enthusiast hubs on our list offer better local control; cloud-first consumer hubs may lose some features offline.
Good guide, but could use more on device compatibility — like which smart thermostats or locks play nice with each hub. Also, any tips for mixing Zigbee and Z‑Wave devices on the same network? I’m worried about conflicts.
Thanks Priya — we’ll expand the compatibility section. Mixing Zigbee and Z‑Wave is usually fine because they use different radios; issues tend to come from hub software or too many devices on one protocol.
We’ll link to a few verified compatibility pages for the hubs in the next revision — good call.
If you’re planning locks, check the hub’s lock integrations specifically — some only support remote status but not battery reports.
Also check for official vs community integrations. Community drivers can add functionality but are less stable.
Short answer: most modern hubs handle both without issue. Just watch channel overlap for Zigbee if you have many Wi‑Fi networks nearby.
This guide was exactly what I needed. I added a hub last month and here’s my messy-but-working story:
I bought the mid-range hub the article mentioned, followed the ‘Plug, Pair, Protect’ steps and spent an evening pairing bulbs, two sensors, and a camera. I hit a snag when one bulb wouldn’t pair — turned out it needed a factory reset first. Then I set up an ‘Away’ automation to turn lights on at sunset when I’m traveling. It felt like magic when it worked the first time.
Couple of extras for newbies:
– Label everything asap
– Keep a paper list of device default credentials
– Back up hub settings if the option exists
Thanks for the actionable steps!
Also, if a device won’t pair, try moving it within a couple of feet of the hub for the initial pairing.
Love the real-world workflow, Olivia — ‘felt like magic’ is our favorite metric. We’ll add your reset tip to the pairing troubleshooting.
Thanks everyone — lots of good troubleshooting tips here for other readers.
Yep, factory reset bulbs are a thing. Philips Hue and others have special sequences for that.
Backing up hub settings saved me during a flaky update. Highly recommend.
Short and to the point — liked the 3-step setup. The ‘Automate and Enjoy’ examples were helpful but I’d love a few more automation recipes for families (like kid-friendly routines).
We use a ‘wind-down’ routine: dim lights, turn on white noise, lock doors. Kids learned the sequence quickly.
Pro tip: pair automations with virtual switches so parents can override quickly.
Good idea — we’ll add family-focused automations (homework lights, bedtime reminders, safe arrival notifications) in a follow-up post.
Great roundup — short and sweet. I liked the ‘Start Small, Grow Smart’ tip. I started with just smart bulbs and now I’m adding sensors. The hub recommendations make sense for beginners.
One thing I wish the guide had: a quick compatibility checklist (Zigbee vs Z-Wave vs Wi‑Fi).
Otherwise, super helpful for someone who gets overwhelmed by options 🙂
Thanks, Emma — good idea. We’ll add a compact compatibility table in the next update to help folks quickly match devices to each hub.
If you have Echo devices, check for local control options too — some hubs integrate better with Alexa than others.
Agreed on the checklist — saved me hours when I first set things up. Zigbee for bulbs, Z‑Wave for older sensors, Wi‑Fi for cameras usually.