Why Securing Your Router Is Step One
Your router is the bouncer of your digital house.
Every device you own — phones, laptops, cameras, smart doorbells — walks through that front door.
If the bouncer is half asleep with the door wide open, the wrong kind of people can walk right in.
Most routers ship with weak passwords and out-of-date software.
Hackers love that.
The good news?
You don’t need to be a tech wizard to lock things down.
You just need the right kind of router for your personality.
In this guide, I break it down into three simple types of users:
🔒 The Privacy Protector — built-in VPN and hardened defaults.
⚙️ The Power User — advanced controls, traffic segmentation, and intrusion protection.
🛡️ The Set-It-and-Forget-It type — automatic updates and simple recovery when things go wrong.
Pick the lane that feels right — the router will do the rest.
Router #1: Privacy-First Setup (Built-in VPN + Strong Defaults)
This type of router is for people who want a quiet but serious security guard.
You don’t fiddle with it. You don’t tweak it.
It just sits there and protects you all day long.
Think:
- No shady features that leak your data
- Hardened settings
- Strong encryption
- A built-in VPN you can turn on with a tap
What actually matters (in plain English):
- Make sure remote access is OFF unless you turn it on.
- Use WPA3 Wi-Fi if your devices support it.
- Turn on a Guest Network so visitors can’t touch your stuff.
- Use a secure DNS provider like Cloudflare or Quad9.
- If the router has built-in VPN, turn it on (or set it up once and forget it).
Tiny downsides you should expect:
- Using a VPN can slow your top speed a little.
- Initial setup takes 10–15 minutes instead of 3.
- Older devices might need the older WPA2 option.
Best For:
Privacy fans, remote workers, and anyone who hates the idea of their home traffic wandering the open internet. last thing you want is to be locked out of your own network when you’re halfway across the country.
Router #2: Power-User Setup (Segmentation + IDS/IPS)
(A.K.A. “Your house now has digital rooms with locks.”)
If you like understanding how your network works — or you have a home lab, security cameras, smart gadgets, or teenagers — this is your lane.
This setup lets you split your network into zones, like:
- Trusted (computers, work gear)
- Family (phones, tablets)
- Kids (devices with limits)
- IoT (cameras, smart plugs, doorbells)
- Guest (internet only)
This way, a hacked smart lightbulb can’t spy on your laptop.
Each device stays in its lane.
Some routers also include IDS/IPS, which is just a fancy way of saying:
“If something weird happens, shut it down before it does damage.”
In plain English:
- IDS = “I see something suspicious.”
- IPS = “I’m blocking it.”
Practical downsides:
- A little more setup.
- You’ll have to occasionally allow a device through if it gets blocked by mistake.
- Heavy inspection can drop your top speed a bit.
Simple fixes for common issues:
- Smart devices won’t connect? Put your phone on the same Wi-Fi during setup.
- Game console complaining about NAT? Put it on the main network temporarily.
- Something blocked that shouldn’t be? Mark it as trusted. Done.
Best For:
Tinkerers, families with lots of devices, smart-home users, home labbers — basically anyone who wants business-level control.
Router #3: Set It And Forget It Pick: Automatic Updates & Easy Recovery
What You Get Right Out of the Box
These routers are for normal people.
People with jobs.
People who don’t want to spend Sunday afternoons updating firmware.
Think:
Eero Pro, Nest WiFi Pro, TP-Link Deco.
The router handles updates, blocks sketchy sites, and requires strong passwords right out of the box.
Do this at setup and you’re golden:
- Turn on automatic updates.
- Change the default admin password.
- Create a Guest Network with isolation.
- Turn on malware/URL filtering.
- Save a quick backup of your settings (takes 10 seconds).
If an update ever breaks something:
- Restore your backup.
- Roll back firmware if the app allows it.
- Worst case: factory reset → restore backup → done.
Best For:
Busy homes, parents, non-techy users, and anyone who wants modern protection with basically zero effort.
⚡WiFi Guys Take
There’s no “one-size-fits-all” router when it comes to security — it really depends on how you use your home network. If you want maximum privacy with as little fuss as possible, go for the privacy-first model with built-in VPN and tougher defaults. If you like having full control over every corner of your network, the power-user model with segmentation and IDS/IPS is your playground. And if you just want strong protection without babysitting settings all the time, the simple-but-secure model gives you automatic updates and peace of mind.
You know your home, your devices, and how much tinkering you’re willing to put up with — pick the lane that fits your comfort level and threat profile.
Now, take three quick wins:
- Audit your current router — update those defaults.
- Decide what matters most — privacy, control, or simplicity.
- Follow the checklist in the section that matches your style.
Lock down your network today — your future self will thank you.


Loved the “simple-but-secure” pick — as someone who’s not super techy, automatic updates and easy recovery are huge.
Question: how good are the ‘hardened defaults’ across these brands? Like, if I buy one and just plug it in, will it be reasonably safe or do I still need to do a bunch of manual hardening?
Also: any tips on passwords, 2FA, or remote admin settings for the average user? Thanks!
Password tip: use a unique passphrase (not just a single word) and a password manager. For 2FA, set it up and keep recovery codes in a safe place.
Also toggle off WPS and UPnP if you don’t need them — common attack vectors. And yes, enable automatic updates if the router supports a rollback or easy recovery option, just in case an update goes sideways.
If you’d like, I can add a short checklist for non-technical users in the article: things like change admin user, enable automatic updates, disable WPS/remote admin, set up guest Wi‑Fi, and enable 2FA.
That checklist would be amazing — thanks! A simple step-by-step would make me much more confident picking one of these models. 😊
Short answer: varying degrees. Synology tends to ship with stronger defaults and more privacy-first options enabled; ASUS offers good defaults but some advanced features might be off by default; Netgear’s defaults vary by model. Regardless, change the admin password, enable 2FA if available, and disable remote admin unless you need it.
Power-user here — the article nailed the importance of network segmentation and intrusion protection.
I run IoT/devices on a separate VLAN and use the ASUS for deep packet inspection rules. The visibility is worth the extra config time.
One thing missing: recommendations for small offices with a mix of wired and wireless devices. The Synology is fine, but do any of you pair these routers with a small managed switch?
Good point, Tom. For small offices I’d recommend pairing a secure router (Synology or ASUS, depending on features you prefer) with a managed switch that supports VLAN tagging. That lets you enforce segmentation at the access layer. We didn’t want to overcomplicate the article, but could write a short follow-up on router + switch setups if there’s interest.
I run an RT-AX86U with a UniFi 8-port managed switch. Works great — just remember to plan your DHCP scopes and VLAN IDs before you start migrating devices.
Good article. Curious: the ASUS RT-AX86U Pro is the “gaming router” here, but how does it compare security-wise to the Netgear and Synology? I want low latency for games but don’t want to sacrifice intrusion protection.
Great question, Marcus. The ASUS RT-AX86U Pro balances performance and security — it has solid intrusion detection features and decent firmware update cadence. Netgear’s RS500 (Wi‑Fi 7) is more bleeding-edge for throughput but check its early firmware maturity; Synology leans strongest on privacy defaults. For gaming + security, ASUS is a strong middle-ground.
I use the ASUS for my console and it’s been fine — QoS is great for prioritizing game traffic and I turned on AiProtection for IDS/IPS. Little extra CPU load but worth it imo.
Wi‑Fi 7 in a home router? huh. 😂
I’m skeptical of big new standards until they actually fix real problems (like garbage default passwords and zero-touch updates).
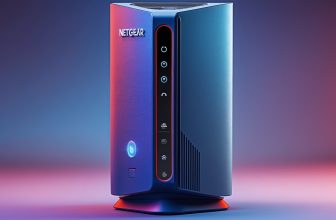
That said, the Nighthawk RS500 looks flashy. But does flashy = secure? Feels like marketing sometimes. Anyone tested its automatic recovery or update process? Also, lol at router boxes trying to be “cool”.
Totally get the skepticism, Ava. New standards like Wi‑Fi 7 bring speed and capacity benefits, but security depends on firmware maturity and vendor practices. The RS500 has promising specs; just watch for a few firmware cycles before fully trusting it in a privacy-focused setup.
Short follow-up: if you want a safer bet now, consider the “simple-but-secure” pick in the article for automatic updates and easy recovery — less bleeding edge, more predictable security behavior.
I had an early Netgear AX model that kept needing manual updates — true story. I’m waiting for a couple of stable updates before upgrading to Wi‑Fi 7 devices.
To add: flashy UI doesn’t equal security. Check for things like signed firmware, update frequency, and community reports. Also enable automatic updates if available (but back up your settings first).
Great roundup — thanks! I chose the Synology RT6600ax after reading about the “privacy-first” angle here.
Hardened defaults + built-in VPN was the selling point for me; I was tired of juggling a separate PiVPN box.
Setup was surprisingly straightforward and the traffic controls are actually useful.
One small gripe: the mobile app UX could be smoother, but functionally it’s solid.
Anyone else switched from a boring ISP router and noticed a real privacy difference?
Thanks for sharing your experience, Linda — exactly the kind of user story we hoped to hear. The Synology’s VPN and firewall defaults do make a tangible privacy improvement for most households. If you want tips on tightening the mobile app permissions or configuring split VPN, happy to add a short how-to.
Quick tip: if you’re worried about the app, use the web interface for initial configuration and only enable the mobile app features you need. Also consider setting up 2FA for your router account.
I switched from an ISP modem/router combo to the RT6600ax too. Night-and-day for me — less random device drops and I can actually see which gadget hogs bandwidth. Agree app could be nicer though.